Building an A.I. Blog Post Generator: How I Saved 120 Hours using an MCP with Neon
Building an AI-Powered Blog Generator: How I Saved 120 Hours with MCP and Neon
So far, I've been kind of reluctant to use AI when it comes to writing code, which means that any bugs, security issues, or mistakes found in any of my projects was written by my own two hands. Outside of code generation, however, there are other places that I found AI to be incredibly useful for. These include things such as refining a product idea, thinking through technical design decisions, or just straight up using it as a better Google search.
Whilst I really like these more chat-based interactions, lately I've been using AI to automate a number of other tedious tasks that used to take up way too much of my time. These include things such as generating git commit messages when I've forgotten to commit for a while, or helping me to write documentation, which is something that's never really been my strong suit.
In addition to these, however, recently there's been one use case that stood above the rest, and has been my absolute favourite use of AI so far. Whilst this use case is a little bit more product-focused, it's managed to save me around 120 hours, at least by my calculations. Not only this, however, but it's also helped to solve one of the biggest problems I currently have with my content creation.
So what is this magical use of AI? Well, it's basically blog posts. I know, it sounds kind of dumb, but hear me out.
The Problem: Missing Written Guides
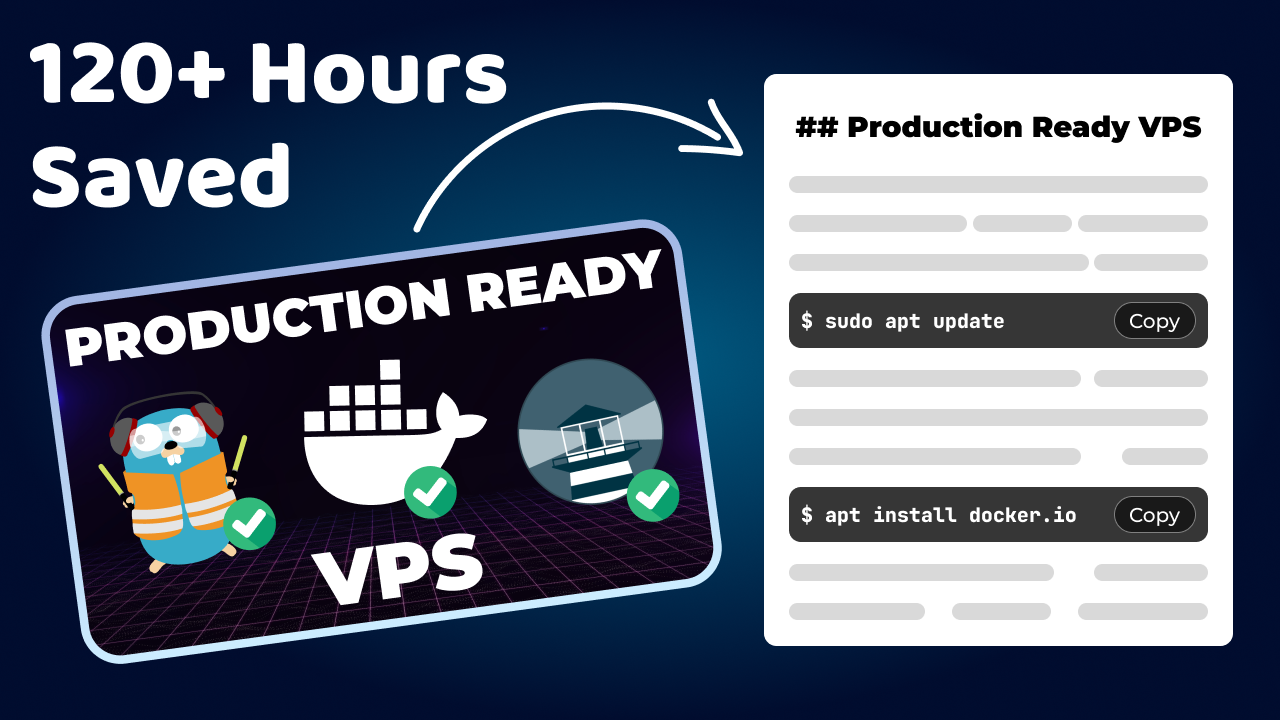
If you've followed my content for a while, then you know that I like to do deep technical guides on various different topics, such as setting up a Zenful Tmux configuration, advanced HTTP routing in Go, or spinning up a production-ready VPS from scratch. Because these videos contain a lot of information, they all suffer from the same problem. They lack a proper written guide to go along with them.
Now, to be fair, I have shared both code snippets and command lists on GitHub for each of these videos, and whilst it's better than nothing, it's not the same as a full, well-structured guide, in my opinion. Personally, I much prefer to follow along with written content when it comes to tackling technical tasks.
So given that I've almost completed my first full course, and I'm getting ready to jump back into creating content full-time, I decided it would be a good idea to go ahead and rectify this issue, not just for any new videos, but for old ones in my catalogue as well.
However, rather than spending time improving both my organisational and writing skills, which would no doubt make me a better content creator, and perhaps even a better man, I instead decided to lean into modernity, and went with outsourcing all of this personal development to AI.
The Solution: AI-Powered Blog Generation
I achieved this delegation of the human experience by building a new feature into my Dreams of Code website. That allows me to pick a video from my archive that I can then use to generate a fully formatted blog post from, with copyable code blocks, command snippets, URLs with further documentation, and even placeholders for screenshots I can add in later. Although that is something I'm planning on automating next.
But it doesn't just stop there, as I can also chat with an LLM in order to refine the blog post content, such as providing any missing context, fixing mistakes, or even adding in updated things I've learned since the original video was recorded. It basically gives me a rather complete draft based on my own content. Then all I need to do is just polish it ever so slightly.
So how did I go about building this? Well, that's actually been the most interesting part, as I initially started with a more traditional approach to developing this feature. But after running into a number of different issues, I ended up taking another route. One that was announced about six months ago in the AI space, and I've kind of overlooked. Consisting of three letters. M. C. P.
Before I explain what that is, and how it led to what I think is my best AI solution so far, let's take a look at the original approach that I tried, in order to gain some context onto some of the issues I ran into.
Step 1: Converting Videos to Transcriptions
In order to be able to turn a video into a blog post, the first step I needed to complete was to convert the video into a transcription. To achieve this, I began by looking at the OpenAI transcription service. However, I ended up ruling it out because of two main reasons:
1. Cost: The transcription API endpoint costs money to use. Not a lot, to be fair, around 10 to 20 cents per video. But personally, whenever I'm testing and developing software, I always like to prefer a no-cost approach, just to prevent any runaway costs from potentially occurring.
2. File Size Limitations: It only supports uploading files of up to 25MB in size. This meant I had to extract and re-encode the audio file from the video in a lower bitrate, in order for it to match the size constraint. And I found that by doing so, it would sometimes negatively affect the quality of the transcription.
In addition to this file size restriction, the transcription service only supports audio durations up to 1500 seconds, which is 25 minutes in total. In my case, many of my videos are actually longer than this duration, which meant I would again need to process my audio files in order to be able to upload them, which again could impact the transcription quality.
Enter Whisper CPP
Therefore, I decided to do some research and look for another approach, and ended up finding one that solved both of these issues. Whisper CPP, which is an open source project that allows you to run Whisper models locally with none of these restrictions.
# Clone and build Whisper CPP
git clone https://github.com/ggerganov/whisper.cpp.git
cd whisper.cpp
make

# Download a model (base model recommended for speed/quality balance)
./models/download-ggml-model.sh base

# Generate transcription from video
./main -m models/ggml-base.bin -f input_audio.wav -ot txt
So I cloned down the repo onto my system and followed the fantastic documentation in order to build it on my machine, which was the brand new AMD AI series of the Framework 13. Given the branding of the CPU, I kind of assumed it would work well with Whisper CPP, but that didn't end up being the case. Whilst it did work, it ended up being slower than I expected, especially when compared to running Whisper CPP on my older MacBook Pro.
Storing Transcriptions with Neon
Therefore, in order to save a bit of time whilst testing, instead of generating these transcriptions over and over again, I decided to instead store them in my Dreams of Code website Postgres database, which is powered by Neon.
This is important to note for a couple of reasons. The first of which is that Neon is the sponsor of this video, which I'm really excited about, as I've been using Neon as my Postgres provider for just over a year now, both on my Dreams of Code course website and other SaaS products as well.
In addition to me actually using the product, the second reason as to why Neon was important, however, is because they provide a couple of features that make it possible to use AI with my data securely, which I'll talk a little bit more about later on.
In any case, before I began writing the Whisper CPP transcriptions into my database, I went about forking my production data into a new branch, which is one of the features of Neon that I really like. This feature allows you to work with your production data without the risk of corrupting it. It basically allows you to test in production without actually testing in production. Yeah, it's pretty awesome.
-- Example transcription table structure
CREATE TABLE transcriptions (
    id SERIAL PRIMARY KEY,
    video_id VARCHAR(255) NOT NULL,
    title VARCHAR(500) NOT NULL,
    content TEXT NOT NULL,
    created_at TIMESTAMP DEFAULT CURRENT_TIMESTAMP,
    updated_at TIMESTAMP DEFAULT CURRENT_TIMESTAMP
);

-- Index for faster lookups
CREATE INDEX idx_transcriptions_video_id ON transcriptions(video_id);
With a new branch of my production data inside of Neon, and with Whisper CPP both installed and working on my system, I was now able to generate transcriptions for my videos and store them in my Postgres database. Therefore, step one was complete.
Step 2: The LLM Formatting Challenge
The next step was to turn this transcription into a well-formatted blog post. However, this is when things started to get a little more challenging.
Whilst Whisper is great for generating accurate transcriptions, when it comes to interpreting spoken CLI commands or code, then it kind of falls flat. This meant that, by itself, the transcription wasn't exactly usable to just publish as a blog post, unless I wanted to cause my readers to regret ever learning to read in the first place.
Therefore, in order to turn this transcription into a half-decent blog post, I needed to figure a way to both format and edit the content into something more readable. In order to achieve this, I had two options:
1. Edit all of this content myself by hand
2. Delegate it to more AI
Given that editing this by hand would basically have been a full-time job, I decided to take the latter approach.
The Initial OpenAI Approach
And so I started integrating the OpenAI SDK inside of my code, adding in an encouraging prompt asking the LLM to turn the generated transcript into a well-formatted blog post.
// Initial approach with OpenAI SDK
package main

import (
  "context"
  "fmt"
  "os"

  "github.com/sashabaranov/go-openai"
)

func generateBlogPost(transcription string) (string, error) {
  client := openai.NewClient(os.Getenv("OPENAI_API_KEY"))

  resp, err := client.CreateChatCompletion(
    context.Background(),
    openai.ChatCompletionRequest{
      Model: openai.GPT4,
      Messages: []openai.ChatCompletionMessage{
        {
          Role: openai.ChatMessageRoleSystem,
          Content: "You are a technical writing assistant. Convert video transcriptions into well-formatted blog posts with proper code blocks, headings, and structure.",
        },
        {
          Role: openai.ChatMessageRoleUser,
          Content: fmt.Sprintf("Please convert this transcription into a well-formatted blog post:\n\n%s", transcription),
        },
      },
      MaxTokens: 4000,
    },
  )

  if err != nil {
    return "", fmt.Errorf("ChatCompletion error: %v", err)
  }

  return resp.Choices[0].Message.Content, nil
}
Unfortunately, however, formatting the text from a transcription into a half-decent technical blog post isn't as easy as using a single encouraging prompt. This is because, well, as we know, LLMs hallucinate. And whilst a good percentage of those hallucinations are correct, there are times when they get things wrong.
In my case, the two biggest issues that I would encounter would be either when a command or block of code was interpreted incorrectly, or when the context of the video would sometimes be misunderstood. This would most likely happen when the transcription misunderstood what I like to think was my accent, but most likely was times when I was mumbling.
This compounding of LLM mistakes would then bubble up in the output of the written content. Sometimes this would only require me to change a single line or two in order to rectify the issue, but in most cases would require me to spend a bunch of time re-editing the entire thing.
The Reality Check
Initially, I decided to implement and test this feature in order to help reformat all of the lesson transcriptions in my Building CLI Applications in Go course. And it was taking me around an hour per lesson in order to re-edit the transcription.
# Quick calculation of the time commitment
lessons = 120
time_per_lesson = 1  # hour
total_time = lessons * time_per_lesson
print(f"Total time needed: {total_time} hours")
# Output: Total time needed: 120 hours
Firing up the Python REPL in order to figure out how much time this would have taken me, I ended up working out that, given there were 120 lessons in the course, it would have taken me just around 120 hours. And that's not even considering the fact that there was other content that I wanted to bloggify.
And so after spending around 5 hours editing a grand total of 5 lessons, it became pretty clear that I needed to find another approach.
The Breakthrough: Conversational AI
And so I spent some time thinking about what my ideal workflow would be. In the end, it was actually kind of simple. All I needed to do was to be able to provide more context to the LLM whenever it made a mistake. However, I couldn't do this statically, i.e. providing multiple prompts inside of my code. Instead, the context needed to be given in a much more dynamic way, such as in response to what the LLM was generating. Basically, I needed to be able to have a conversation with it.
In order to test that this conversing workflow was the right approach, I decided to just go ahead and copy and paste the transcription into Claude, followed by prompting for the changes that I wanted it to make. This is what I believe the AI bros refer to as prompt engineering.
As it turns out, prompt engineering worked really well, and allowed me to interactively work with the LLM to shape the transcription into a semi-decent blog post. Honestly, it kind of felt like I had my own personal copywriter, just one that didn't really complain about the amount of hours I was making it work, and didn't ask for any time off.
All jokes aside, it was something that was quite empowering. So, having proved that the workflow was effective, I decided to implement this chat-based interface into my solution.
Enter MCP: Model Context Protocol
However, rather than building my own AI chat app, like some once-blonde-haired mad lad, I instead decided to use a different technology. One that's come about quite recently in the AI landscape, one that Neon supports - MCP, which stands for Model Context Protocol.
If you're not too sure what that is, it basically defines a standard way for LLM chat interfaces to interact with external data sources, allowing you to connect a model directly to your applications, APIs, and databases such as Postgres.
As I mentioned, Neon, who I used for all of my Postgres needs, provides an MCP server that you can connect to, allowing you to work with your data through the use of an LLM.
Setting Up Neon MCP Server
Now, if that sentence gave you a somewhat visceral reaction, then don't worry, that's the exact same feeling I had when I first considered this approach as well. The idea of letting a hallucinating LLM loose in my production database is a rather uncomfortable feeling. Forget vibe coding, that to me feels a lot more like YOLO coding.
However, if you remember, I mentioned that Neon has a feature that mitigates the risk of a bad hallucination causing all of your data to be deleted. That feature is branching, which I actually talked about a little bit before.
Basically, it allows you to fork your entire database into a separate branch that you can then use without the risk of blowing up any of the parent data, which in my case was production. Typically, I use this branching feature when it comes to testing database migrations, or if I want to deploy a review version of my application without it potentially breaking prod.
In this case, it was also perfect for ensuring that the LLM wouldn't break anything when it accessed my transcription data. And so, I went and forked my production data yet again into another branch - one that I could use specifically with the MCP server.
// Claude Desktop MCP Configuration
// Add to ~/Library/Application Support/Claude/claude_desktop_config.json (macOS)
// or %APPDATA%/Claude/claude_desktop_config.json (Windows)
{
  "mcpServers": {
    "Neon": {
      "command": "npx",
      "args": ["-y", "mcp-remote", "https://mcp.neon.tech/sse"]
    }
  }
}
In order to be able to use it, I then needed to configure the Claude desktop application to connect to the server provided by Neon. This meant that I unfortunately had to use my MacBook Pro, as there wasn't a version of Claude desktop available for Linux, which was a bit of a shame.
In any case however, after downloading Claude onto my MacBook Pro, I went about setting up the MCP server, which was really easy to do so. All it took was for me to add in the configuration lines above into my Claude desktop configuration. Then, once I restarted Claude desktop, I was able to authenticate with Neon, and I could access all of my Neon projects from the LLM interface.
Which, yeah, does feel incredibly spooky the first time you try it.
The MCP Experience
In fact, for me it never stopped feeling spooky, which did end up leading me to implement another solution later on, which I'll talk about in a minute. Despite it feeling spooky however, it was ultimately still safe, given that I had set up a separate Neon branch for the LLM to interact with, and my main branch was also set to protect it.
Not only this however, but every time that Claude interacts with an MCP server, it prompts for confirmation on the command it's about to run. I guess prompt engineering works both ways.
Whilst this prompting for confirmation is great for ensuring that the queries and commands Claude was going to run weren't going to destroy my entire business and life, I did find that it ended up slowing down the overall experience for me, as I was having to spend time confirming each action before executing it.
When it came to generating content from my YouTube videos, this wasn't too much of an issue as I only had one database table to interact with. But when it came to generating them from my course lesson contents, because these span over a number of different tables, it meant I had multiple queries to confirm, which did end up taking a lot more time.
Despite this however, pulling out the transcriptions from the database ended up working really well, and once the transcription data was loaded into the model's context, I could then just use prompting in order to provide additional context about what I wanted the blog post to be.
Not only using this approach to fix any mistakes caused by the LLM, but even for things such as improving the original content, and really refining the blog post into something better than the sum of its parts. This included things like performing fact checking on the content itself, and being able to add in additional points that I may not have covered in the original video.
This to me was an incredibly powerful way of working with my existing data, and allowed me to create blog posts in minutes that would have normally taken me hours or even days.
Writing Back to the Database
In any case, once I was happy with the generated output, I then needed a way to insert it back into the database. If I was using something such as Hugo or Astro, then I could have just used this markdown file directly, and called it Job Done.
However, because I'm using a database already for my course content, then I instead decided to go ahead and use Static Site Generation or SSG, which means I needed to write this content back into the database somehow.
Initially, I considered doing this with the MCP server provided by Neon, but I had a massive internal conflict about allowing an LLM to make writes to my database. So instead, I decided to take a much more prudent approach, and just downloaded the markdown file onto my machine, and then created a custom CLI command to allow me to insert it into my database.
#!/bin/bash
# Custom CLI for inserting blog posts

# blog-import.sh
if [ "$#" -ne 2 ]; then
    echo "Usage: $0 <markdown_file> <video_id>"
    exit 1
fi

MARKDOWN_FILE=$1
VIDEO_ID=$2

# Read markdown content
CONTENT=$(cat "$MARKDOWN_FILE")

# Insert into database using psql
psql "$DATABASE_URL" << EOF
INSERT INTO blog_posts (video_id, title, content, status, created_at)
VALUES (
    '$VIDEO_ID',
    'Generated Blog Post',
    '$CONTENT',
    'draft',
    NOW()
);
EOF

echo "Blog post imported successfully for video: $VIDEO_ID"
This would not only create the blog post for me, but would also allow me to perform any final edits on the content itself.
Building a Custom MCP Server
Whilst this approach worked, it still wasn't as smooth as an experience as I would have liked it to have been. And coupling that with the heebie-jeebies that I still felt from allowing the LLM to perform SQL queries, I instead decided to take the best parts of this process and go one step further.
This next step was to just implement a custom MCP server myself, specifically for pulling out transcriptions and creating blog posts from the generated content, without the need for an LLM to directly access my Postgres database.
For this, I used the excellent mcp-go library from Mark3 Labs, which provides a clean Go implementation of the Model Context Protocol.
# Initialize a new Go module for the MCP server
go mod init transcription-mcp-server

# Add the required dependencies
go get github.com/mark3labs/mcp-go
go get github.com/lib/pq// Custom MCP Server Implementation using mcp-go
package main
import (
"context"
"database/sql"
"fmt"
"log"
"os"
"time"
"github.com/mark3labs/mcp-go/mcp"
"github.com/mark3labs/mcp-go/server"
_ "github.com/lib/pq"
)
type TranscriptionServer struct {
db *sql.DB
}
func NewTranscriptionServer(dbURL string) (*TranscriptionServer, error) {
db, err := sql.Open("postgres", dbURL)
if err != nil {
return nil, fmt.Errorf("failed to connect to database: %w", err)
}
if err := db.Ping(); err != nil {
return nil, fmt.Errorf("failed to ping database: %w", err)
}
return &TranscriptionServer{db: db}, nil
}
func (ts *TranscriptionServer) GetTranscription(ctx context.Context, args map[string]interface{}) (*mcp.CallToolResult, error) {
videoID, ok := args["videoId"].(string)
if !ok {
return nil, fmt.Errorf("videoId must be a string")
}
var content string
err := ts.db.QueryRowContext(ctx,
"SELECT content FROM transcriptions WHERE video_id = $1",
videoID,
).Scan(&content)
if err != nil {
if err == sql.ErrNoRows {
content = "Transcription not found"
} else {
return nil, fmt.Errorf("database error: %w", err)
}
}
return &mcp.CallToolResult{
Content: []mcp.Content{
{
Type: "text",
Text: content,
},
},
}, nil
}
func (ts *TranscriptionServer) SaveBlogPost(ctx context.Context, args map[string]interface{}) (*mcp.CallToolResult, error) {
videoID, _ := args["videoId"].(string)
title, _ := args["title"].(string)
content, _ := args["content"].(string)
// Save blog post to file system instead of database
filename := fmt.Sprintf("blog-%s-%d.md", videoID, time.Now().Unix())
file, err := os.Create(filename)
if err != nil {
return nil, fmt.Errorf("failed to create file: %w", err)
}
defer file.Close()
// Write frontmatter and content
blogContent := fmt.Sprintf(`---
title: "%s"
videoId: "%s"
date: %s
draft: false
---
%s`, title, videoID, time.Now().Format("2006-01-02T15:04:05Z07:00"), content)
_, err = file.WriteString(blogContent)
if err != nil {
return nil, fmt.Errorf("failed to write content: %w", err)
}
return &mcp.CallToolResult{
Content: []mcp.Content{
{
Type: "text",
Text: fmt.Sprintf("Blog post saved to %s", filename),
},
},
}, nil
}
func main() {
dbURL := os.Getenv("DATABASE_URL")
if dbURL == "" {
log.Fatal("DATABASE_URL environment variable is required")
}
ts, err := NewTranscriptionServer(dbURL)
if err != nil {
log.Fatalf("Failed to create transcription server: %v", err)
}
defer ts.db.Close()
// Create MCP server
s := server.NewMCPServer(
"transcription-server",
"1.0.0",
server.WithLogging(),
)
// Register tools
s.AddTool("get_transcription", "Get transcription by video ID", map[string]interface{}{
"type": "object",
"properties": map[string]interface{}{
"videoId": map[string]interface{}{
"type": "string",
"description": "The video ID to get transcription for",
},
},
"required": []string{"videoId"},
}, ts.GetTranscription)
s.AddTool("save_blog_post", "Save generated blog post", map[string]interface{}{
"type": "object",
"properties": map[string]interface{}{
"videoId": map[string]interface{}{
"type": "string",
"description": "Video ID",
},
"title": map[string]interface{}{
"type": "string",
"description": "Blog post title",
},
"content": map[string]interface{}{
"type": "string",
"description": "Blog post content in markdown",
},
},
"required": []string{"videoId", "title", "content"},
}, ts.SaveBlogPost)
// Start the server
log.Println("Starting MCP server...")
if err := s.Serve(); err != nil {
log.Fatalf("Server error: %v", err)
}
}This not only helped to ensure that my data wouldn't be deleted, but it also sped up the entire process of content creation for me, as it allowed me to not need to confirm every command that the MCP server was trying to run.
Not only this, however, but it also served as a really good excuse to implement my first MCP server, which was both fun and enlightening.
The Results
Through this, the new implementation allowed me to generate formatted blog posts for the remaining 115 lessons that I needed to in my course, in less than three hours. Not only that, however, but I now have a fully working blog post on my Dreams of Code website, which has written content to go along with my videos.
In fact, I even have a blog post generated for this video as well, which you can find on Dreams of Code. And it even has steps on how you can set up Claude Desktop to work with Neon's MCP server, in case you're interested.
As I mentioned, this has been perhaps the most favourite thing that I've built with AI so far, and it's left a really good impression on some of the innovation in the AI space, especially as I'm one that's often sceptical about some of the advances being made, often chalking them down to hype.
Not only did this save me a huge amount of time, however, but I actually think the quality of the blog posts are somewhat half-decent, and being able to interact with the LLM in order to improve them really makes up for some of the drawbacks of using prompting in the first place.
What's Next: Zenful Studio Suite
In fact, I actually like this solution so much that I started building out a full product with it to go along with my Zenful Studio Suite, which are a set of tools that I'm creating to help with content creation. If you're interested, you can find a link to it in the description down below.
Of course, the Zenful Studio Suite is also being powered by Neon, like most of the applications that I've built over the last year.
Key Takeaways
1. Whisper CPP provides a cost-effective, local solution for transcription without file size limitations
2. Neon's branching feature makes it safe to experiment with AI database interactions
3. MCP (Model Context Protocol) bridges the gap between LLMs and your data sources
4. Custom MCP servers give you fine-grained control over AI interactions
5. Conversational AI workflows are far more effective than single-shot prompting for complex tasks
The combination of these technologies saved me 120 hours of manual work while producing higher-quality content than I could have created manually in the same timeframe.
Thank You
And I want to give a big thank you to Neon for sponsoring this video. If you happen to use Postgres, and you're looking for an affordable, modern service where you can easily deploy multiple database instances, each of which that can have multiple branches of your data, then I really recommend checking them out.
Even though they're sponsoring this video, I've been using Neon for just over a year now, and in my experience, they've been absolutely fantastic. I honestly couldn't have wished for anything more from a Postgres provider.
Also, fun fact, through this video, I actually found out that the founder of Neon, Heikki Linnakangas, is actually one of the major contributors to Postgres itself, which makes a lot of sense, and you can really see that reflected in the product.
So, if you want to try out Neon for yourself, there's a link here.
Otherwise, that's all from me. However, I'd love to hear from you. Have you tried working with any MCP servers yet? Or maybe you're interested in how you can actually build and deploy one yourself? Either way, let me know in the comments down below. Otherwise, I want to give a big thank you for watching, and I'll see you on the next one.